
DIY: Sisal Rope Ottoman
- Dianyvet Serrano
- Mar 26, 2020
- 2 min read

Updated: Mar 30, 2020
Feeling a little bored at home? Don't forget that all those things you buy... YOU can make too:-). Well, maybe not all of the things in your current situation... but you can do A LOT with a lot less than you thought. So what am I making? A sisal rope ottoman!
Here is a picture of what I am recreating:

And guess how much this particular one is going for? NEARLY $70. It's beautiful right? Totes not worth $70 though. Now IKEA also has an option linked here. It's a little smaller and a different material than the one I am recreating but just as beautiful. So why Do It Your own?
1. You're saving some monies... if you're going to get the IKEA one, it's not much but it is still SOME SAVINGS
                                       (total for my DIY was $24)
2. You're helping to lesson the burden on Delivery Peeps during this Quarantine era. They deserve to be safely at home just like you but instead of making their jobs easier, many of us are buying MORE online, which directly increases delivery folks hours.3. Most importantly, IT'S FUN! DIY'ing does take time, but you have a lot of it right now! So instead of spending it rewatching every episode of "On My Block", spend your time learning a new skill! (or do both simultaneously like I did while watching "Jersey Shore, Reunion" haha)
So, What do you need?!


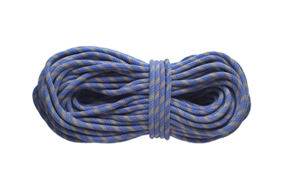
Yup, that's it! I found my tire in front of someone's house ( this was before COVID-19). I (my girlfriend) washed it off with cleaning spray, a sponge and a bucket of water. Let air dry for a couple of hours and brought it inside to begin! First you just simply tie the rope around the tire repeatedly. Then, you begin hot glueing the sisal rope around, beginning in the middle of tire. Make sure you use strong, flexible rope for the tying around. I used jute which is probably not the best idea but the only one I had handy. I am still trouble shooting how I will build a better structure for the ottoman.
**HOT TIP**: Start the pattern off first with only the glue and the rope, SANS tire
After that, you just keep going! I ran out of glue sticks so my tire is on hold until amazon delivers them to me...sorry amazon delivery peeps :-(
Here is a photo montage of my current progress. Hope you've enjoyed this post and it's given you some inspirations! After realizing how easy it is to glue sisal rope together, I've been inspired to possibly try others and ensure that I don't spend any more money on over-priced rope placemats:-)


Thank you for reading! And remember, stay safe!
xoxo,
Eudamonia
I FINISHED! Here tis the final product. Thinking of doing a "Review" post later on the product but as of now, Pluto approves this message and LOVES his new bed.


Comments